Pages

Monday 31 May 2021

Sloths in Love

Hello again. Where has the time gone? I promised to be more active on my blog and look, here I am falling behind with blogging new posts. Tut, tut, tut. Let's do a bit of blog catch-up.

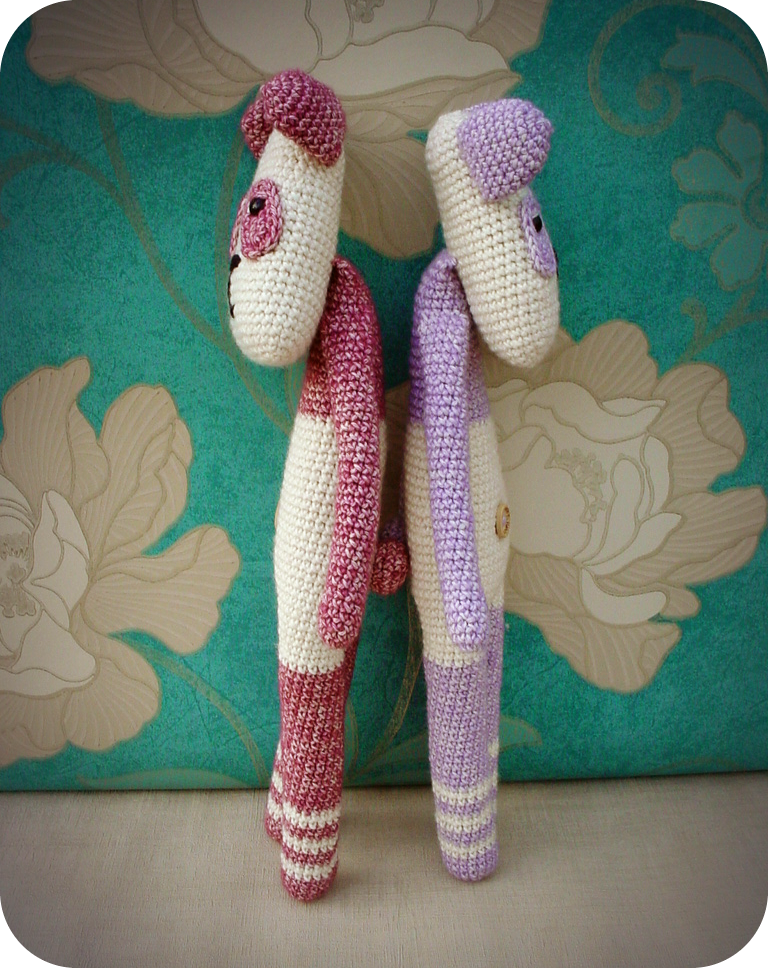
This may feel like a blast from the past :) Here below is my crochet work I made for Valentine's Day 2021 - two embracing sloths :)


The moment I saw these two hugging each other, I knew I'd be crocheting them soon. I thought Valentine's Day would be a perfect occasion for it plus the fact that I'd never made a sloth before. 


Little did I know how much effort and patience of mine these sloths will take LOL. They look deceptively easy to make. The pattern I used to make them is by One and Two Company from Etsy. 


What I like about it is that the girl sloth is made in a different, lighter shade than the boy sloth. What a cute idea. I followed it.


For both I used Scheepjes Stone Washed and Yarn Art Denim Washed. The browns, beiges and creams work really well here and I love the "washed" effect. 


The sloths have extra long arms so that they can hug each other tightly. You can sew their arms together so the will stay in a permanent embrace or you can attach velcro patches to their paws so they are repositionable, which is what I did.


This is where the "fun" started. At first I spent a long time crocheting all 24 small toes - 12 per sloth - onto their arms and legs. Fiddly job but me being me, I insisted on sewing them perfectly centred and in line. Huffing and puffing I plodded on, arm by arm, leg by leg until all toes were sewn on. Phew! Halleluiah!


Then I discovered that the adhesive velcros wouldn't stick to yarn as much as I wished them so. So I tried sewing them on but this didn't work either. The needle gunked up and wouldn't pass through the fabric and the velcro. Damn! 

My last resort - hot glue! This is when the magic had happened. Well, nearly had. Because I discovered that I'd put the velcro patches on the outer side of the arms and legs of one of the sloths. Pants!


Getting a little frustrated here and swearing under my breath now. I managed to save the messed up arms and legs by removing the bits of already dried glue with a warm iron. I re-did the velcros again making sure I'd put them on the right side this time. 
Later, I nearly sewed on the head of one sloth in a wrong position. I just realized that as I started putting the first stitches. The trick is that their heads need to be turned at 90 degrees to their bodies so the sloths are looking sideways while their limbs and bellies are facing front . Generally you really have to pay A LOT of attention to where and how you sew these pieces on. 


The way I sewed their limbs on allows the sloths to stretch their arms and even lie flat without pulling or stretching. 


There is a great deal of flexibility in their joints and you can put the sloths in various positions which is what I like in crochet toys. 


After all that bother with sewing up limbs and heads, all that was needed was just a nice photo session to complete the whole thing. 


All's well that ends well. :)

Saturday 10 April 2021

Easter Chick

Hello again :)

Spring is in full swing now and although the weather is still a bit cold and windy here in the UK, I decided to have a colourful Easter indoor this year. I just needed these bright energizing colours in my life, sunshine, warmth, positivity especially now when there has been so much people's misery and sadness at work and around. I also cannot simply wait when the Covid-19 will be a thing of the past. 

Roll on sunnier, happier days!

So, to put some sunshine into my life, I decided to crochet this cute Easter chick to add to my Easter decorations. 

I'm pleased how he has turned out, sizewise and colourwise. I used Yarn Art Jeans yarn (my favourite recently!) and a 2.0 mm crochet hook. The chick is about 18 cm tall. 


I used a pattern from Etsy - by Sandra Toy Designs. It was clear and easy to follow.

I love this little fella and his/her cheekiness of wearing a bunny ears hat. 

I added some little tufts of hair on its head. It always makes a chick look extra cute, I think :)


I also opted this time for some black bead eyes instead of inserting plastic safety eyes, as I tend to. I'm quite pleased with the effect. A small neat pair of eyes were needed for this chick and all the safety eyes I've got are 5 mm or more. (Weirdly, you can't find easily small safety eyes under 5mm size complete with washers. Trust me. Been there, done that.)

And just look at these green booties - one of my favourite details! :)

I added a little tail of my own... For some reason the pattern didn't predict it. I had to improvise a bit.


I love Easter, do you? Everything is new, fresh, baby flowers and baby animals. Life is waking up again. There is hope. 


So my place at Easter is always full of eggs (I've been collecting /making these over time), baskets, doilies, spring flowers, porcelain figurines of ducks and bunnies, decorated trees.


Hope you all have a lovely Easter break. 
Easter blessing to you all! 

Tuesday 30 March 2021

Pandas with panditude

Time to present my further crochet creations from February this year. Meet Pickles and Pandora - two cheeky pandas with a full-blown "panditude" :D

These two panda bears have been crocheted using a pattern from Kornflake Stew - a lovely and talented designer who has created many wonderful crochet characters. Check out her website. You will find yourself browsing her Etsy store sooner than you think!

I am a big fan of her "tall animals" series and these two are a part of it. I like to call them "hunchbacks" because of their slightly hunched postures. I just love the quirkiness of these characters.

Their square-ish heads are mounted in a slightly unusual way most crochet toys have, which gives them a characteristic part grumpy, part dreamy look. They are movable up and down and slightly to the sides so you can arrange them in different poses.

Add the droopy eyelids to that... :) (I love these sleepy eyelids! One of my favourite details!)

Doesn't that "panditude" show now, huh? 

Both pandas were made using Scheepjes Stone Washed yarns (Moonstone, Ruby and Amethyst shades) and a 2.5 mm crochet hook producing a 35 cm tall toy. I decided for non-standard Panda colourways 'cause I was curious what they would look like in pinks and purples :)

The stripy socks, wooden belly buttons and little bob tails (pandas do have tails, you know!) are my own modifications. I like to make things a little mine :D

Really enjoyed making them. They were easy and fun to make and they turned out quite cute. 


A group photo with my another Kornflake stew character I will blog about later. 


More Kornflakestew crochet to come in the future. I promise :)
Have a nice week!

Sunday 28 February 2021

Llewelyn

As promised, I am back here again to share more up-to-date crafty stories. It's 1st of March tomorrow. In Wales it is a nationally celebrated St. David's day. I thought it would be a perfect opportunity to crochet a dragon toy (the red dragon being the national symbol of Wales). 

So here he is. Meet Llewelyn :) 


He received his name after a medieval Welsh ruler - Llewelyn the Great. A Welsh dragon needs a good old Welsh name, won't you agree? :)


To make him I used a pattern from Kornflake Stew. Originally he is Django, the dragon. But my aim was to make him as Welsh-looking as possible :)


I decided he will be made with Scheepjes Riverwashed yarn, shade: Nile. This two-tone yarn is just perfect to make a red dragon. The cotton red core of the yarn is blended with some yellow/orangey fuzz giving it a fiery look. Its yarn weight is sport/baby so it gives a nice size. The toy is about 35-36 cm tall. Not too small and not too big either. Just right.


The Red dragon of Wales despicted on the flag is all red but I didn't want Llewelyn to be entirely red as it would be a bit bland. I wanted some contrasting horns, spikes and wings but at the same time not to be diverting from the Welsh colours either. Another Scheepjes Riverwashed yarn, shade: Seine has worked really well here. The core of the yarn is red but the outer green fuzz gives a nice contrast. So this way I could have my cake and eat it :D :D :D


I was pleased to see how these two shades work well together in this dragon.


I modified his wings a little. I made them a bit larger and one row longer. I know they are meant to be grotesquely small and this is part of his charm but those in the pattern were way too tiny for him.


A little tag attached. The crafter's signature, saying "mine!" :)


The Daffodil pin - another symbol of Wales. Love daffs - the sign the spring is on its way! 


His feet really amuse me LOL They are more like trotters than dragon's talons :))))


Thanks to his feet and a short tail he can stand on his own!


Oh dear, I think he is a bit sad...

Now with his mates :) Better.


The End

Have a nice week and don't forget to say hello :)
New projects in the making! Coming soon!